# PanelAlpha Engine
PanelAlpha Engine is software you install on your VPS so it can host websites.
Building with AI is fun. Running the result on your own server usually is not. Open source is booming too: more projects than ever are meant to run on your own machine, and most of them still expect you to know and handle Docker, a webserver, certificates, a database, backups, a firewall, and the updates that follow. The engine makes that easy.
You give it a link to a code repository, or to an open source project you found. It works out what kind of application the code is, installs whatever that application needs, builds it, starts it in its own isolated space, gives it a web address, and secures that address with HTTPS.
Many of the sites on the engine are WordPress. You can ask for a new WordPress site without bringing any code, and you can look after WordPress you already host in the same chat: WordPress.
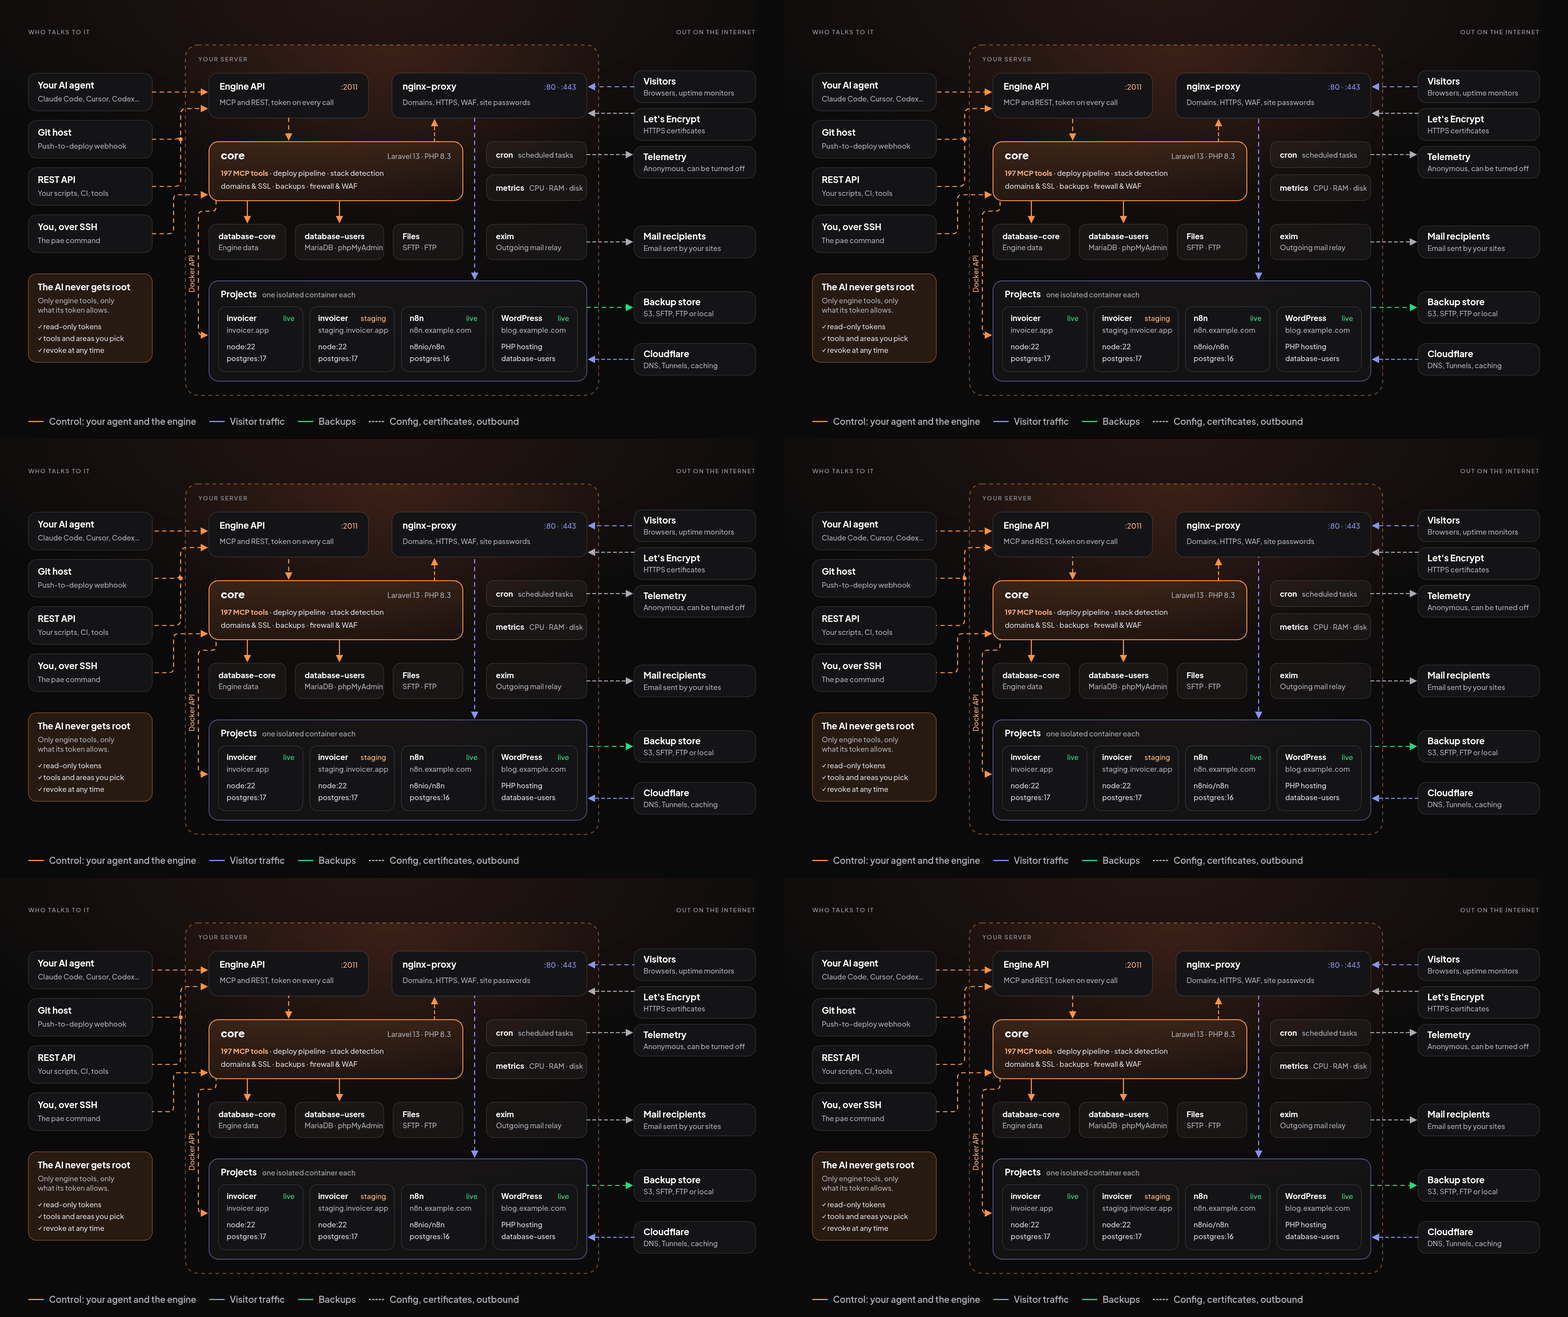
The main way to drive it is to ask an AI assistant in plain language. "Set up WordPress." "Deploy this repository." "This site is broken, what happened?" You can also run it from your VPS with the pae command, or from your own software over a REST API. All three do the same things, because all three talk to the same engine: Three ways to drive it.
This guide is for the person who runs that VPS, including someone who already has sites on it. You will not be asked to write a Dockerfile or edit a webserver config.
# If you already have sites
If this engine is already running and already has sites, skip the install below. Connect your assistant, then ask it to list your projects. Many of those accounts are WordPress: If WordPress is already on this engine. Older versions called a project a "user"; username in output is still the project's name.
List the projects on this engine.
# Getting started
# 1. Install on your VPS
You need a fresh VPS, root access over SSH, and one command. Full requirements and options are on the Install page; the short version is:
curl -fsSL https://get.panelalpha.com/engine | sh
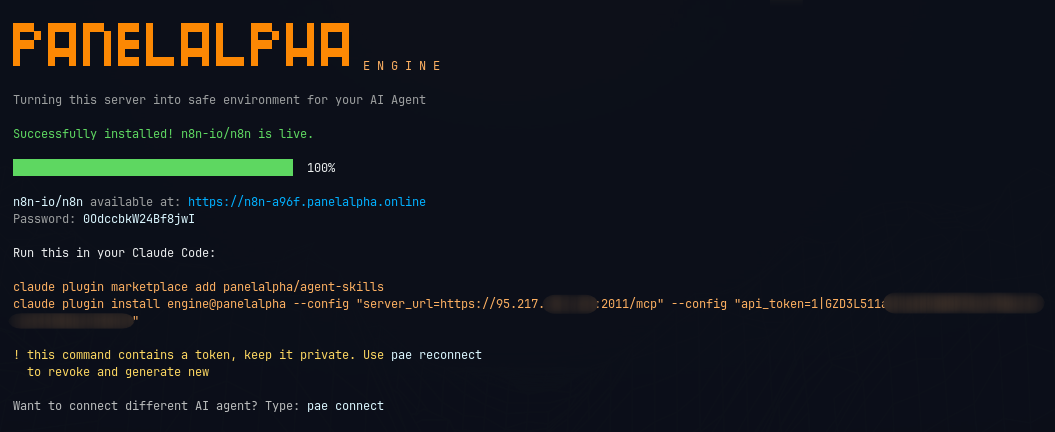
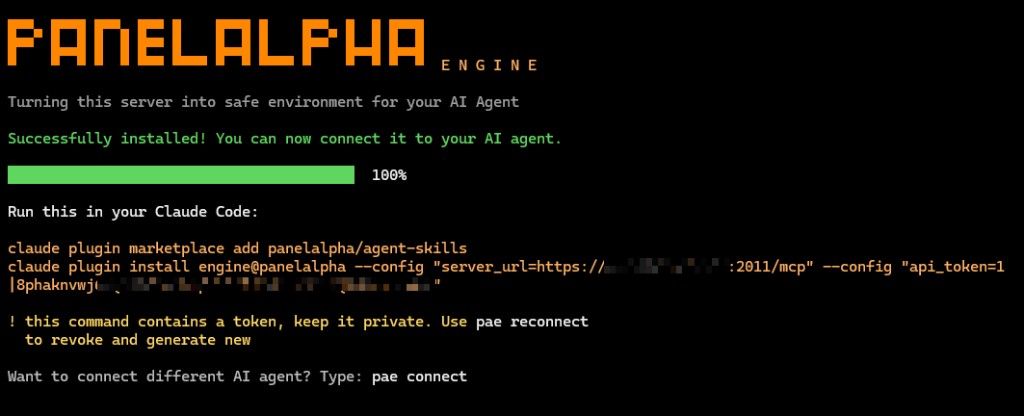
A few minutes later the engine is running and prints its addresses and a command to connect your assistant. Want a custom name, your own TLS, or a VPS behind NAT? Read Install first.
Telemetry is on after install: anonymous reports about deploys and later health checks leave your VPS unless you turn them off, and they include the public names of your sites. What is collected · How to turn it off.
# 2. Connect your AI assistant
Your assistant reaches the engine over MCP, the interface an AI assistant uses to call your engine. Connecting happens on your own computer, not on your VPS, and nothing more needs setting up on your VPS first.
- Claude Code: the installer already printed a ready-made command for you. Copy that command from the installer output and run it on your computer. Nothing to run on your VPS.
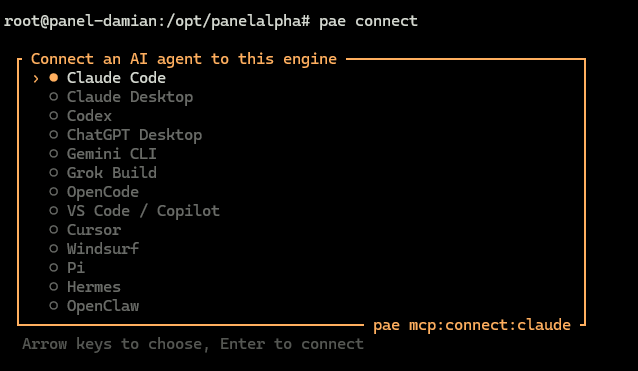
- Any other assistant: on your VPS, run
pae connect, choose your assistant with the arrow keys, and press Enter. It prints the exact line to run on your computer, with your address and a token already filled in.
pae connect
Run
pae connecton your VPS, not on your own computer.
Each assistant has a setup page with how to check it worked and what usually goes wrong: Connecting your AI. Anything that speaks MCP will work, even if it is not listed: connecting other assistants.
Before you connect, decide what the assistant may do. By default it can permanently delete an entire project: Decide what the assistant may do.
# 3. Put a site online
Open your assistant's chat and describe what you want in plain English. Two common starts are WordPress with no code of your own, and an application from a git repository. If the site is already on this engine, do not create it again: If WordPress is already on this engine.
# WordPress, without your own code
Set up WordPress on a new project on this PanelAlpha Engine.
The engine creates the project, a database, and the WordPress files. Finish the first administrator account next: WordPress.
# A public git repository
Deploy my application https://github.com/org/app on this PanelAlpha Engine.
What this does: the assistant creates a project (one website on this VPS), downloads the code, works out the framework, builds it, and starts it on HTTPS.
What you should see: a web address. Open the address it gives you, not the one you expected, because the engine may assign a different one.
You do not need to pick a domain, create a database, or name the framework first. The file that identifies the application (package.json, composer.json, go.mod, and so on) has to sit at the top level of the repository: What your repository needs.
# A private repository
Tell the assistant the repository is private. Do not put the access token in the chat.
Deploy https://github.com/org/private-app on this PanelAlpha Engine.
The repository is private.
The assistant sends you a link on this engine. Open it, paste a git access token that can clone that repository, select Save secret, then go back to the chat and say you are done. The engine stores the token encrypted and uses it to clone. Later rebuilds reuse it. The assistant never sees the value. The link lasts one hour.
The repository URL must be https://, with no username or password in it.
# A zip of files, not a repository
Upload this archive into the project and deploy it: /path/to/app.zip
# 4. Open it, then look after it
Open the address in a browser.
- It opens and looks right. You are done with the first deploy. Next you can add your own domain, take a backup, or make a test copy (below).
- The address ends in
.local. Nobody on the internet can open that site. The application is fine; it has no public name. Point DNS at your VPS, then add a domain: Domains and HTTPS. - The deploy failed, or came back "partial". When a deploy fails.
- It opens but is not your site (a placeholder, a directory listing, an error page). Ask:
This site does not open properly. Read the deploy log, check what the site is
actually serving, and tell me what is wrong.
The engine looks from inside the account and names what it found: Monitoring and logs.
Once the site is up, the same chat is how you look after it:
Add shop.example.com to this project and request a Let's Encrypt certificate for it.
Create a backup of this project.
Make a staging copy of this project.
Point the DNS record at your VPS before you ask for a certificate. A restore overwrites the live site, so list backups first if you are unsure. Full pages: Domains and HTTPS · Backups · Projects.
Do not name a domain when you create a project unless that domain already points at this VPS. If you leave it out, the engine picks a public name and tells you what it chose. Naming a domain that is not set up yet turns a working deploy into a failed one.
To update a site later, after you push new commits or change files:
Rebuild this project.
Not sure what to say? What to ask has more examples.
# What you can do
A project is one website on your VPS. Each site gets its own isolated space, its own files, its own address, and its own database. Sites cannot see or affect each other.
In the same chat you used to connect, you can:
- Run WordPress. Ask for a new site without bringing your own code, deploy one you already keep in git, or look after WordPress that is already on this engine: WordPress.
- Deploy an application from a public or private git repository, or from a zip of files. Your own tools, something you built with AI, or an open source project you found. The engine works out what the code is and puts it on HTTPS.
- Use your own domain, with a free Let's Encrypt certificate, or reach a site through Cloudflare.
- Take a backup before you change something, and restore if it goes wrong.
- Make a test copy of a live site, try changes there, and push them live when you are happy.
- Create a database, upload files over FTP or SFTP, or run a scheduled task the application needs.
- See why a page is broken, from the deploy log and from what the site is actually serving.
Everything else in this guide hangs off a project: a domain belongs to a project, a database belongs to a project, a backup is a backup of a project.
Older versions called a project a "user", and you will still see username in some output. It means the project's name.
# Three ways to drive it
All three do the same things, because they all talk to the same engine.
| Way in | What it is | When you use it |
|---|---|---|
| An AI assistant | You describe what you want in a chat window. | This is the main way. No commands to learn. |
pae on your VPS | A command you type over SSH. | You have no assistant connected, or want to check something yourself: CLI commands. |
| The REST API | An HTTPS interface for software. | You are building something on top of the engine. The same operations are on CLI commands. |
The technical name for the AI-assistant interface is MCP. All it means in practice is "the way an AI assistant is allowed to call your engine", and it is a thin layer over the same REST API, so an assistant can never do anything the API cannot. You never need to know more than that.
# How a deploy works
When you point the engine at a repository, it runs one process from start to finish. That process is called a deploy, and it goes like this:
- Provision. The engine creates the hosting account and an isolated container for it.
- Detect. It looks at your files to work out what the application is - Laravel, Next.js, Django, Rails, Go, a plain
DockerfileorContainerfileand many more - and which language versions your project asks for. - Build and run. Your dependencies are installed, the application is built and started inside that container.
- Route and secure. The engine's webserver sends your hostname to that container, and requests a free Let's Encrypt certificate.
- Verify. The engine opens your site from inside the account and checks that what answers is really your application, not a placeholder page or an error.
If nothing answered, or the hostname cannot be opened from the internet, the deploy finishes as partial rather than successful and says in plain sentences what is wrong. See Monitoring and logs.
Step 2 is the one that most often goes wrong, almost always because the file that identifies your application is not at the top level of the repository. See What your repository needs.
# Deploying again later
At the end of a successful deploy the engine saves the exact plan it used. A rebuild replays that saved plan, so it runs what shipped last time rather than deciding again from scratch. Once a project is deployed from a repository, updating it is a rebuild.
# Where to go, by task
| I want to… | Read |
|---|---|
| Install the engine | Install |
| Create a token | Create a token |
| Connect my assistant | Connecting your AI |
| Fix "registers but will not connect" | Trust a self-signed certificate |
| Change a setting | Change a setting |
| Update or remove the engine | Updating, Uninstall |
| Deploy my first site | Put a site online |
| Look after sites I already host | If you already have sites |
| Install WordPress, or look after one I already host | WordPress and known apps |
| Change PHP on traditional WordPress | Change the PHP version |
| Deploy a private repository | A private repository |
| Work out whether a site is really up | Monitoring and logs |
| Restrict what my assistant can do | Decide what the assistant may do |
| Add a domain and HTTPS | Domains and HTTPS |
| Reach a site through Cloudflare | Cloudflare |
| Create a database | Databases |
| Back up or restore | Backups |
| Upload files, or set up FTP | Files, FTP and SFTP |
| See which project types are supported | Supported projects |
| See if a site is still healthy | Monitoring and logs |
| Understand a failed deploy | When a deploy fails |
| Look up an error message | What the error means |
| Find out why my repo was misdetected | What your repository needs |
Look up a pae command | CLI commands |
| Understand telemetry | Telemetry |
| Turn off telemetry | How to turn telemetry off |
| Browse every ability my assistant has | Every tool |